Showing posts with label Photography Trick. Show all posts

Lighting Techniques for photography tips and trick

How to shape light using Para lights by Karl Taylor

Lighting Techniques for photography tips and trick by karl taylor. On this occasion, I travel to Broncolor’s studio in Switzerland and meet up with Urs Recher (Bron's in-house photographer and consultant) to shoot the latest in this series of photography training videos.

Our model Sharon is wearing white against a white background for this “How To” video. We demonstrate the versatility of the Broncolor’s Para 222 with a selection of the many types of shot that can be achieved using this amazing light.


In this interview for broncolor lighting, Karl Taylor talks about his techniques and equipment for creating his images:

Lighting Techniques Interview with Karl Taylor - Part 1


Lighting Techniques Interview with Karl Taylor - Part 2


Lighting Techniques Interview with Karl Taylor - Part 3


[read more]

Using a square foot cardboard box that we will transform into a mini photo studio

The photo you see above is the starting point of one of the setup we will be using to get the white "infiniti" background. We will be using a square foot cardboard box that we will transform into a mini photo studio.
accessories Lighbox mini Photo Studio
DIY Building a Lighbox mini Photo Studio
click here to larger photo

accessories Lighbox mini Photo Studio
accessories Lighbox mini Photo Studio
click here to larger photo

The lights you see above were bought at dollar stores and hardware stores, most of them for less than $5. We will not use all of them for the different lightbox setups in this tutorial but I did test them all and only ended up using the best ones. For this tutorial(s), you will need a box cutter, some tape, cisors and a few accessories you can buy for pennies which we will use to decorate the inside of the box as well as use to diffuse, reflect and direct the lights. We will talk in more depth above those in the videos.
click here for more detail video tutorial.
[read more]

Photoshop Tutorial CREATE FANTASY PORTRAIT with RETOUCHING TECHNIQUES

Photoshop Tutorial CREATE FANTASY PORTRAIT with RETOUCHING TECHNIQUES befor
befor
click here to larger photo

Photoshop Tutorial CREATE FANTASY PORTRAIT with RETOUCHING TECHNIQUES after
after
click here to larger photo

Photoshop Tutorial CREATE FANTASY PORTRAIT With the techniques you'll master after completing this Photoshop tutorial, you will be able to create many different looks for your portraits, whether you just want a subtle enhancement or you really want to push it and transform your portrait into something that is out of this world!

Photoshop RETOUCHING TECHNIQUES and Color Grading

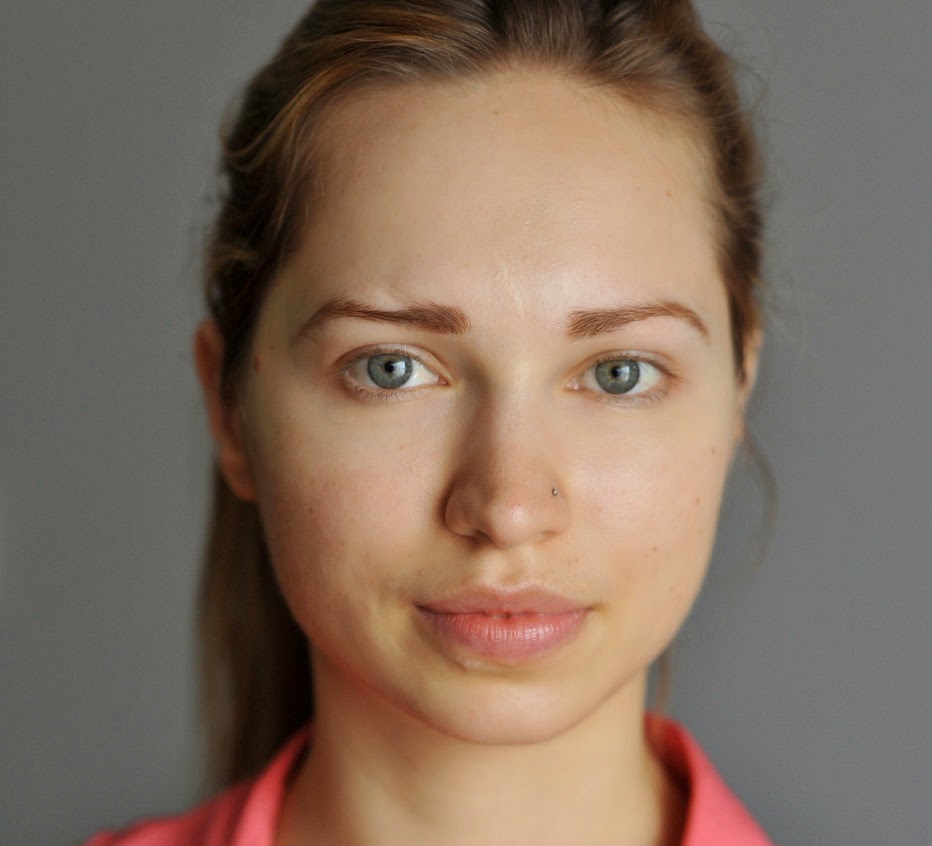
In this 50 minute VIDEO tutorial, we will start with an unretouched portrait of a girl, a photo anyone can take at home with their camera and transform it into some sort of fantasy character. We will go through every step I took to get the final result, from working on the skin, color grading, lighting and finishing with the background.

Download photoshop tutorial in here : DOWNLOAD
[read more]

Photoshop Tutorial CARTOON CHARACTER WITH PHOTOMANIPULATION and RETOUCHING

Photoshop Tutorial CARTOON CHARACTER
click here to larger photo

Photoshop Tutorial CARTOON CHARACTER: We will be covering a lot of things in this massive tutorial. You will learn step by step how you can create any cartoon character you imagine using photomanipulation, retouching and color grading techniques. With only Photoshop and stock photos (or your own) you can create a unique caricature that can be a logo, a mascot for a product, a character in an ad, etc.. You can of course use the same techniques explained in this tutorial, in a more subtle way, to spice up your portraits or images.

This tutorial has a massive 89 steps detailing the entire process to achieve the image above and don't worry, all my tutorials can be done by anyone who has basic knowledge of Photoshop. Unlike other tutorials you'll sometimes see out there, you don't need to be a skilled digital painter to achieve the same results I get here - as I'm not a good digital painter myself ;)

As you can see below, I started out with a sketch of what I wanted to recreate in Photoshop. When doing a project like this, it is not a bad idea to do a sketch on a piece of paper, even if you are not that good at drawing, just so you have a clear idea of what you want to achieve. Another reason why drawing a rough a sketch is important is that a cartoon character has very different proportions than a real person and since we are using stock photos of real people to achieve our character, it's useful to have the scanned sketch of a cartoon in the background of your canvas in Photoshop to really help guide you in your creation. If you really cannot draw to save your life, you can use any cartoon image you find online and use it as a guide for proportions.

Photomanipulation + Retouching + Color Grading Tutorial
This Photoshop tutorial has 89 steps explained with text instructions + images and there are 2 steps a little more complicated that are explained with videos.
Tutorial Format: Text & Images + 2 Videos , Steps: 89 , Images Included
Download photoshop tutorial in here : DOWNLOAD
[read more]

camera settings for macro photography

Marco photography is interesting in taking pictures of objects, with the very thoroughness of detail makes the image will be more vivid and interesting to look at. macro image is the image of the object in the picture take from short distance or close up. all right we'll learn which camera settings do like for Marco photography.


Setting the ISO speed

By definition the ISO is a measure of the level of sensifitas camera sensor to light. The higher the ISO setting the more sensitive we terhada sensor light.
To get a clear picture of our camera's ISO setting (in the case of ASA photographic film), just imagine about a bee community.
An ISO is a worker bees. If I set the camera at ISO 100, it means I have 100 worker bees.
And if I set the camera at ISO 200 it means I have 200 worker bees.
The task of each worker bees are picking up the light entering through the lens of a camera and make a picture. If we use an identical lens and aperture equally we set at f/3.5 but I set at 200 ISO 100 while you (think again about the worker bees), then the image got who will finish more quickly?

Outline:
When we add to the ISO setting of 100 to 200 (in aperture is always constant aperture lock – we at f/3.5 or through the Aperture Priority mode – A or Av), we shorten the time required in the making of a photograph in the camera sensor we get half (2 times faster), from shutter speed 1/125 to 1/250 sec.
As we add more ISO to 400, we trim the time making up half the photos again: 1/500 sec.
Each time the esksposur shorten the time by as much as half, we call the raise esksposur by 1 stop.

You could try this sense in the case of aperture, shutter speed set try we always constant at 1/125 (or Shutter Priority mode through-S or Tv), and ubah-ubahlah your ISO setting in multiples of 2; missal from 100 to 200 to 400 ... etc, see change your aperture size.


With macro photography, you can (and should) take time to get the composition exactly perfect (or perfectly, you can imagine what), so do not hesitate above, below and around the theme of your mind to move. Unless, you Hummel or the buzz shoot, you have no time pressure, thus bracketing the best exposure according to the perfect composition retrieve. Locked, if you do not know, at least three of the exact same photographers at various shots takes a color accuracy (top and bottom, neutral) & shadow detail, and depth of field, received the spirit, that lets you compare and make you highlight a selection of the most dynamic.

camera settings for macro photography
  • Manual Mode
  • ISO 100
  • Aperture f/11 - f/13
  • Shutter around 1/160th-1/200th
  • Flash in ETTL mode. 
[read more]

Best Exposure camera setting

Hopefully after we are done with this you will resist any temptations you may have to use the automatic settings provided by your camera. Once you understand exposure, especially f-stops and shutter speeds, you should only ever use your aperture priority, time(shutter) priority, manual, and sometimes program settings leaving all those other settings on your dial worthless. Although those automatic settings can get you good shots, the camera is still trying to figure things out on its own, so you might as well tell it exactly what you want it to do using the manual settings.

Your camera wants to expose your media, be it film, or a sensor, with 18% of the reflected light. You can actually go to many stores and buy gray cards that reflect 18% of light all the time, this can come in handy when using the manual setting, more on this when talking about manual. It will basically use three things to control the exposure, shutter speed, aperture(f-stop) and ISO.

Shutter Speed

Okay, lets start off with the easy one, shutter speed. I'
m sure most of you already know what shutter speed is, it is basically how long the lens is open. Now, the more challenging question is, what does shutter speed do to the exposure. Your mostly affects two things, the amount of light exposed to the media, and motion.

First, the longer your shutter is open the more light will get in, this might be an obvious statement sorry. This means if your shutter is open for too long everything will start to turn white, completely white if open long enough, and o n the other side if your shutter isn't open long enough everything will start showing up black until it is pure black if the shutter wasn't open long enough to get any light in.

Second, the shutter controls motion. Lets say we are taking a picture of a child running. If your shutter is open for a long time the child will be blury, if your shutter is fast enough you can actually stop the child's motion. There are benefit s to doing both things. If you want to capture the movement of water, like a flowing stream, you would want your shutter open longer so you can get that silky look you see in great stream shots. If you are taking a picture of a race car, you probably want to show the motion, there is a technique called panning, where you move with the car, but use a long shutter speed, this makes every thing blurry around the car, but the car is sharp (if you do it right) so it looks like it is moving. However, with the running child situation, you probably want a nice clear shot, so you want a fast shutter speed to stop them in the frame.

Here are the types of values you can expect to see from your camera. These are in full stop values. Stops are used in photography to refer to a change in the exposure, so this list will show you a full stop difference in the amount of light hitting the media. Your shutter speeds on your camera will show up as fractions of a second or with "s next to them indicating the value is in seconds. So if you see the value 125 that is really 1/125 of a second. If you see 1" that is 1 second. You can see these values usually either in the view finder as you are framing our shot, or on your settings display somewhere. It is usually paired with Tv, for time value. I will list these from slow to fast shutter speed, most of the speeds are just divided in half to get the next stop, but there are a few exceptions. Your camera might have a bigger range than this, mine goes from 30" to 4000.

The location of my shutter speed on my settings display. I can also see these values as I'm looking in the view finder.Best Exposure camera seting1" Slowest most light.
2(0.5")
4
8
15
30
60
125
250
500
1000
2000 Fastest least light.

Quick review, without looking above, what two things does the shutter speed affect? If you can't answer this, and don't know why they are important read over the section again until you understand exactly what your shutter speed can do for you.

Aperture

Okay, now onto the part that takes most people the longest to understand. Your aperture, like your shutter, controls two things. Aperture is also called f-stop, in fact that is probably what I will call it from here on out, I just need to refer to it as aperture so you will understand where the A comes from when we talk about your camera settings. So your f-stop will control two things, once again the amount of light hitting the media, and your depth of field(dof). The depth of field simply is the amount of your shot that will be in focus. So a small depth of field would only have the area you focused on in focus, whereas a large depth of field would have everything in the shot in focus.

First, your f-stop controls the amount of light. Think of this like your pupil in your eye. When your pupil gets smaller it lets in less light, this usually happens when you are outside and it is really bright. When your pupil gets larger it lets in more light, this is usually the case when all the lights are turned off at your house at night, your eye is almost all black because your pupil has opened up to let in more light. Just like with your s hutter, if you open your aperture too much your shot will be all white, and if you close it too far your shot will be black.

Second, your f-stop controls the dof. This is backwards and took me a while to get my head wrapped around it, but the wider your aperture is open the smaller your depth of field. So if my aperture is opened all the way, just the immediate areas around where you focused will be in focus. If your aperture is closed way down your w hole picture will be in focus. For example, lets say you are out hiking and want to take a shot, well, if you decide to shoot the flower next to the path with the mountains in the background, you probably just want the flower in focus and the mountains blurred, so you would use a small aperture to get just the flower in focus. On the other hand if you wanted to take a shot of the mountains you would want to close your aperture so the entire shot would be in focus.

Here are the values you can expect to see from your camera. Again these are in full stop values, meaning if you go up or down one spot you are ch anging a full stop. Most cameras actually show values at half stops, some let you show them in 1/3 stops, and I think there are even some out there that let you see things in 1/4 stops. Again this is just part of the range, your camera may be bigger or smaller. If you don't have an SLR it is most likely pretty small, at least my old point and shoot only had I think 3 or 4 stops. And just to confuse you some more these values are all fractions so the more open you are the smaller the numbers will show up on your camera, but remembering they are fractions the values are actually getting bigger. A lot of times people will w rite their values as f/2 read as f2, but this shows that it is a fraction. Usually these values are paired up close to where your shutter speed is next to the Av, meaning aperture value.

The location of my aperture value on my settings display, I can also see this value while looking through the view finder when I'm taking the picture.

Best Exposure camera seting

2 Widest lets in most light. Smallest dof.
2.8
4
5.6
8
11
16
22 Smallest lets in the least amount of light. Largest dof.

Another review, what two things does the aperture, or f-stop, control? If you can't answer these without looking you need to review this section again. This is one of the most confusing things in the beginning, but once you understand it, you are getting closer to knowing how to tell your camera exactly what you want it to do.

ISO

The last thing that controls the exposure is your ISO, this stands for International Organization of Standards, or something like that, yes, I realize that would be IOS and sometimes you might see it like that, but 99% of the time you will see it as ISO. This is also referred to as film speed. If you remember from buying film you might see a number in the corner of the box, usually on a colored stripe. So you might see 100 on a blue stripe. This is the film speed, or ISO for that film. The ISO basically says how sensitive the film is to light. The higher the number the more sensitive the film is to light, this means it is "faster", or basically if you are in a dark room and your shutter speeds are slow like 3" you probably can't hand hold that and get a good shot, so if you use a higher ISO your shutter speeds will start getting shorter. Now you might ask, why not just use a high ISO all the time, so we can take pictures in the dark easier. The answer is because you lose saturation as your ISO goes up and things start getting pixelated, this is often referred to as digital "noise". Some digital cameras are getting good at getting rid of some of this noise with high ISO's but the best thing to do is always use the smallest ISO you can in your situation. There are some pretty good programs out there for free that will get rid of noise for you if you have to use a high ISO.

The values you can expect to see for ISO start at 100 and just keep doubling every stop. Usually for film you see from 100 to 400. I would suggest not to go over 800 unless you really have to, because it will just look bad on most cameras. Setting your ISO will be very different by camera too, usually you can have it choose something automatically for you, which I don't recommend because in the dark it will go as high as it can, or you can set the value. You will have to look at your manual to see how to set it. I recommend not playing with your ISO until you are really comfortable with f-stops and shutters, so just set your ISO to 100 or whatever your smallest value is, mine is 200 and leave it until you have a good handle on exposure. Here are some values you might expect to see in your camera.

100 Least sensitive to light, most saturation.
200
400
800
1600 Most sensitive to light, least saturation, most noise.

Review, what does your ISO affect? If you can't answer this without looking, either read it again, or just set yours to its lowest value and leave it alone for now.

Putting It Together

Okay, lets put these three things all together. The numbers I have shown you are all full stop increments, which is nice for doing the following exercise. Remembering that your camera wants 18% reflection of light, lets say that it figures to best expose your shot using your camera set to an ISO of 100 that you need to use an f/5.6 and a shutter speed of 125(1/125 of a second). You can change any setting as long as you adjust another setting in the opposite direction and you will always get the same exposure. So lets say you want to get a larger dof, this means that you need to make your aperture smaller (you knew that already, right?) So you decide that you want to use an f/11 this is a change of 2 stops. This means you are closing your aperture (letting in less light), so to make up for that you need to adjust your shutter speed by 2 stops to let in more light. So looking at the charts above you will need to go which way to let in more light? Thats right, you need to get a slower shutter speed, so lets make it slower by 2 stops, that gives us a 30(1/30 of a second). You could have done this by adjusting your ISO to 400 also, because that is 2 stops different, but why adjust your ISO when you can adjust your shutter speed just fine? If that didn't make sense read over it again, I will give you some questions to answer below.

Okay, here is a review of what we have learned so far. So you won't be tempted to cheat and look at the answers I will talk about how to user your camera settings before I give the answers.

1. What two things does the shutter speed control?
2. What two things does the aperture control?
3. What is another name for aperture?
4. What does dof mean?
5. If you wanted a large dof would you rather your aperture be set to 4 or 16?
6. If you wanted to let in more light would you set your f-stop to 8 or 22?
7. If you wanted to stop the motion in the shot, like a child running would you rather your shutter speed be at 1" or 250?
8. If you wanted to capture the movement of a stream would you set your shutter to be 1" or 250?
9. If you wanted to let in less light would you use a shutter speed of 1" or 1000?
10. If your camera set the exposure to f/4 and 500 but you really wanted to get the entire shot in focus by changing your aperture to a 22 what would you need to change your shutter speed to?

Camera Settings

Okay now lets look at those settings on your camera for taking a picture, usually this is a little wheel on the top of the camera somewhere. It will have maybe a green box, or arrow, this is usually fully automatic, a picture of a person, a mountain, a flower, things like that. Those are all your automatic settings that you are going to stop using, right? The other settings are usually letters. The first, that we won't really use much is the P setting. This stands for program, if you really want to use it let me know, but there aren't many situations where you would want to use it. The next that we won't use often, and some cameras may not even have it, is B meaning bulb. This setting just holds the shutter open as long as you hold down the button, it lets you set the aperture you want. This is mostly used if you need an exposure longer than your camera will let you set your shutter, that means anything longer than 30" on my camera. Now, the three that you will start using the most, Av or A, S or T or Tv, and M.

Here is a picture of my settings wheel. You can see the green auto pct and the other automatic settings that we are going to stop using, then the P which isn't used very often, and the B for exposures that need to go longer than your camera will let you set your shutter speed, and the settings I will cover below, on my camera they are Tv, Av, and M.

Best Exposure camera seting
Av or A. This is your aperture priority mode. Simply this means you get to choose what aperture you want to use and the camera will decide which shutter speed to use. This is what I use most of the time, and you would use this if you care most about the dof in the shot. So if you are shooting people you want to have a dof that allows to see their face really clear, but you might not want the backgroud, a good setting would be 8 - 16 somewhere in there. If you are taking a picture of a flower, you might want to use something really low(really this is a fraction so it is higher, but whatever) so a 2 or maybe lower if your camera will let you. If you want to get an entire building in focus you might use a 22. Then the camera will figure out what shutter speed would expose things correctly and set that for you. One thing to pay attention to is whether or not you can even expose something correctly, usually your camera has a way to warn you that it can't expose it correctly, mine when I am using this setting just flashes the shutter setting. So for example if I'm outside on a really bright day and I try to open my lens way up, like to a 2 then a shutter speed of 4000 which is the fastest my camera can do, then it will set it to 4000 but it will start flashing to show me that I am getting too much light. Usually there is some type of a wheel that lets you change your aperture setting, and as you do your camera will automatically set your shutter speed.

Here is the wheel on my camera used to set the aperture, or as we will talk about in the next section it will be used to set the shutter speed. Usually this is on your right hand somewhere, either on the back where your thumb can get it, or on the top for your finger to use it.
Best Exposure camera seting

S or T or Tv. This is for shutter priority, the T means time. This does the opposite of aperture priority, it lets you set the shutter speed, and it automatically sets the aperture for you. You would use this setting when you care about motion in the shot. So if you are taking a picture of a stream you might want to use it and set your shutter speed to 1" or 2" and the camera will set the aperture for you. Or if you really wanted to stop the motion you would set it to a 250 or something like that to freeze everything. Again, if your camera can't expose things correctly it will usually warn you somehow, mine flashes the aperture value in this case. So if I was outside in the bright sun taking a picture of a stream and I set my shutter speed to 1" it would close my aperture all the way down and start flashing. Again you would set the shutter speed with your wheel.

M. This stands for manual. You get to set both the aperture and the shutter speed. You would use this when you don't like what your camera is doing automatically for you. For example, if I'm taking a picture of some people outside, the camera usually meters for exposure over the entire image, but lets say I really just want to expose for their faces and I don't care if I over expose the sky, or the sun for that matter. Then I would use M and set both the aperture and shutter speed. Like I mentioned way back in the beginning you can get cards to reflect 18% light, this is useful in times like these, so you put that card right in front of your camera, either set on aperture priority, or shutter priority, and see what the reading is, then go over to your manual setting and set it up to those values, then when you go to take the picture of the people it will expose better for them, rather than the entire scene. This might be a confusing setting to use until you understand everything a little better, so if this doesn't make sense thats okay. Usually in M your wheel sets the shutter speed, then you have to hit a button, which usually says Av on it, and while you are holding that you can spin your wheel to set your aperture.

This is my Av button. When shooting in manual you have to push this button, it usually looks just like this, a diagonal line with a plus and minus sign. You hold this button while you turn the wheel to set your aperture, if you aren't holding this button while you spin your wheel it will adjust your shutter speed. This is usually opposite of where your wheel is, so if your wheel is on your thumb, like mine, this will be on your finger, if your wheel is on your finger, then this button will be on your thumb.
Best Exposure camera seting
Answers to the questions above. You really need to be able to answer these kind of questions without much hesitation so you can make good decisions when you take pictures. I know it is hard at first, but I promise with more practice it becomes second nature.

1. Amount of light, and motion.
2. Amount of light, and depth of field.
3. f-stop.
4. DOF stands for depth of field. It refers to the amount of the frame that will be in focus.
5. 16
6. 8
7. 250
8. 1"
9. 1000
10. 15

This is probably the most difficult thing to learn about photography, but if you understand it really well your shots will be a lot better. Next time I will show you some examples of the things we have talked about and give you a chance to go out and shoot some similar things to get familiar with how it works in practice rather than just in writing. For now go over this stuff until you really understand it and can answer the questions without help from looking above.
[read more]

Setting POV Camera Composition

Okay, lets talk a little bit about point of view, or perspective. Although I haven't seen much participation yet, I am going to move forward anyway because some of you may have lost interest, or been a little confused by the exposure stuff. While I don't think you should continue until you understand it well, I will move on anyway, so if you decide to you can move on as well. You can always go back and keep reviewing the exposure stuff until it starts to sink in, but I promise the best way to start learning exposure is from trying, so please submit some pictures for the last assignment so I can help you out, and you can get more practice. Remember those don't have to be professional shots, they just need to show that you are understanding what the aperture and shutter are doing for you.

I will make the next post about some rules/guidelines that have been around since before photography, but before I get into that lets just see some shots from you. This is mostly just an assignment with little instruction from me. I want to see what you come up with, the perspective, or pov, on the shot can mean a great shot or a poor shot. Most people see a scene and just snap the shot and think it is good enough. Usually the better shot is the one you have to walk around and find. If you are hiking and come upon a waterfall, how many people do you think have taken that same picture? Probably a lot, so a better shot is probably, not always, somewhere else, from a different angle, or position. So you need to start getting in the habit of looking for a different shot than anybody else has taken. Try to find the one that will capture the most interest.

Okay, the assignment here is to go find a subject, I don't care what it is, and take five different pictures of it. Well, I want you to take a lot more than five, twenty, or even fifty if you want, but I want you to post what you think the five most interesting ones are. So take shots from all sides of the subject, take one from far away, really close up, looking down, looking up, or even just a small part of the subject, get creative. This will get you to start thinking about where the best shot really is. Hey this is the digital era, you can't hurt yourself by taking a lot of pictures, its not like you have to go pay to develop film, so be trigger happy and see what you come up with. I will try and get this assignment done soon so you can see what I have done with it.

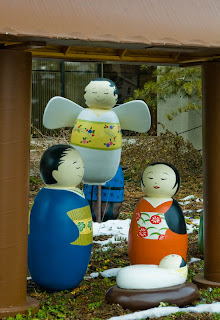
Here are my shots, right now at temple square they have some nativities from around the world, so I took a bunch of shots of this particular one. I think I probably took around twenty. Here are the five I like the best. Which one is better? I don't know it depends on what you like, but I'll tell you my favorite definitely wasn't the first shot I took, or the "walk up" shot. I'll also put my exposure values so you can keep getting used to what they are and what they do. I took these all in aperture priority mode and most of them were at an f/11. The one at f/8 I went lower to get a more shallow dof, usually you won't see that shallow of a dof, but I was using a longer lens, we will have to talk about how lenses affect dof later. Also, like I suggested in exposure, I left my ISO at its lowest setting. Since the lighting was pretty much the same, you'll notice all the settings are pretty much the same.

Setting POV Camera Composition


Composition: f/11 1/60 ISO 200

Setting POV Camera Composition


Composition: f/11 1/60 ISO 200

Setting POV Camera Composition


Composition: f/11 1/60 ISO 200


Setting POV Camera Composition


Composition: f/11 1/60 ISO 200


Setting POV Camera Composition


Composition: f/8 1/45 ISO 200


[read more]

Capturing Portrait the Quintessential Travel


You’d be hard-pressed to find many people who don’t love to travel – especially amongst camera wielders. We love exploring new places around the globe and bringing back photos to share with all our friends. It’s exciting, and a look at the world outside our own perspective.
There are three questions I always find myself being asked when returning from a travel assignment – where did you go, what did you eat and who did you meet? A key component in any good travel photo story is capturing portraits and the daily interactions of the people wherever you go. The astounding diversity across the world is what makes us so fascinating to each other. For this article, we’ll focus specifically on interaction based portraiture instead of candid captures.
Here are a few tips and tricks I use for capturing the quintessential travel portrait.

Perhaps my favorite phrase and one I pass along to anyone looking to create better people-based photography is this, “Check your shame at the door.” What that simply means is never be afraid to ask, dance or make a complete fool of yourself in pursuit of a great photo.
There’s no room for ego in this business and you need to get over any worries you may have about asking people for photographs. The photographer who asks for a portrait will capture 100% more than the one who doesn’t. After all, all they can say is no. If you have plans on making a career in the photo industry you’ll need to get over your discomfort of the word “no.” Because you hear it – a lot.  Take the negativity out of it and think of “no” as merely a stepping stone to another “yes.”
When you get that critical yes – or sometimes the hand gesture or smile that says to conveys an ok – it’s time to jump into action.
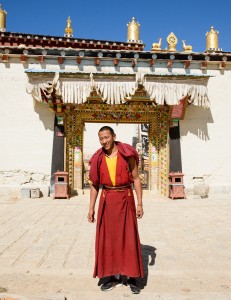
Travel portraiture relies heavily on context. You don’t want someone to look at an image and think you captured it right outside your house – you want to show portraiture that tells the story of this person’s culture. What makes this person unique and interesting to you and your audience? Part of answering that question is knowing the main audience for your images. To a Tibetan a portrait of one of their fellow villagers may be nothing special – but to a Western audience it could be incredibly unique. It’s all about context.
Travel portraiture is more than just up and tight shots. Often it’s half bodies, full bodies, people as small figures in a broad scene and more. The general rule is that an individual is connecting with the photographer/camera or is clearly the immediate subject of the photo.

Showing environment is a great way to add context. Look for backgrounds that interest you and wait for just the right person to come around. Alternatively, grab someone who really interests you and if you can convince them to go to a nearby location even better.  Add variety to your images not only through different environments, but also different poses, expressions and actions. Get that mountain man to smoke his pipe, the chef with a plate of food, the business person with their notepad or the kite surfer holding her board. Use different lighting – front, side, backlit, shade, etc. All these build toward a body of work.
Travel portraiture is all about telling a story. The question is, which story are you telling? Coming back from travels with a lot of portraits that convey a cohesive vision is much stronger than a random collection. It’s all about your perspective and vision.
Do you want to show all smiling, warm and inviting faces… or the grief a recent strife has caused in a region? No answer is right or wrong; it’s simply up to you what kind of photographer you are and the type of images you enjoy capturing.

original post by:: digital-photography-school.com
[read more]

DSLR built-in flash, a few tips on the use of an external flash!


Compact digital camera, DSLR, if you have something in common?

So much, but the amount of light when taking pictures in dark places Sometimes we helped,
Exist, or to play tricks did I
They'll be probably taken pictures of everyone at night, turn on the flash and the experience was awkward.
This failure experience a little lack of understanding about the flash.

Then flash through this post a little bit toward ~
Let me introduce you to a few tips.


1 Write flash only at night?

Night time or dark indoor environment typically used flash.
However, Flash is used only in situations like this is not
Backlit shots, especially in the sun behind the subject in the case of
Compared to the background if the subject is dark, use the flash, the
You can get a photo of a very warm feeling.


2 I do not believe the performance of the built-in flash.

DSLR built-in flash


Of the built-in flash on the camera, the light intensity is very low.
In this case, the subject is usually beyond 2 ~ 5M camera and if I
Differences obsolete or not.
Seemed a good idea if you purchase an external flash to your favorite nighttime shooting.


3 Guide number (GN) What's this?
DSLR built-in flash


Mainly according to the guide number to purchase an external flash, if
I can determine the light intensity of the flash,

Guide number (GN) = (numerical aperture) x (the distance to the subject)

Must bear in mind the above criteria.
External flash has a guide number of 20, for example, in the case of
Subject to 5M distance if the the F4 aperture value and must shoot
Can get the proper exposure.


4 Typical flash shooting mode

If you are using an external flash three main shooting mode, I can
A (AUTO) MODE, M (MANUAL) MODE, TTL MODE it.

The end though sensor by the amount of light flash in A mode, by adjusting the amount of light
Shooting mode. Is the most common method.

M mode, the flash intensity manually adjusted / maintained by the user
Accordingly adjust the aperture value of the camera shooting mode.
Skilful experience, will recommend it to many people.

TTL mode, if I can use the camera supports TTL mode
The direction of the light flash of light intensity sensor and the camera's lens to reach a different,
Measured values ​​may differ, there's a lot of if you get the wrong results.
If this mode is used by measuring the amount of light that reaches the camera lens
By tuning the camera and external flash can be used (recommended)


5 Simple flash shooting techniques

DSLR built-in flash


Bounce shot, Omni bounce shooting.
Literally bounce shot toward the ceiling or wall, the direction of the external flash
Reflected light shooting.
Will use a lot of indoor shooting and wedding photography and natural light to create.

'm Gonna Omni bounce flash of light the cloudy filter attached to the Department of dispersing light,
A powerful flash of light, you can create a little bit gently.
This way ^ ^ It's some toilet paper pad, which also


7 Dark, he unconditionally do not use flash.

Shooting at night, even if the shutter speed or aperture value, if well utilized,
Can get a picture of elegance in its own.
Never not use a flash, especially if shooting night scenes instead
In this case, a tripod to prevent shaking, you can get a good result.


In addition, how to use an external light meter or sync speed, but more
Beginners who know this part is a little difficult because only about this case. Introduce Having!
[read more]